請詳 http://lunglungdesign.blogspot.tw/2012/11/arduino.html
2015年1月25日 星期日

2015年1月22日 星期四
畫出頻率圖形
用 Arduino 偵測頻率,並畫出圖形。
電路接法:

下載頻率程式庫 http://interface.khm.de/wp-content/uploads/2009/01/FreqCounter_1_12.zip
首先我們先來練習如何偵測頻率,請將下列程式貼到 Arduino IDE 裏:
#include <FreqCounter.h>
void setup() {
Serial.begin(57600); // connect to the serial port
Serial.println("Frequency Counter");
}
long int frq;
Void loop() {
FreqCounter::f_comp= 8; // Set compensation to 12
FreqCounter::start(100); // Start counting with gatetime of 100ms
while (FreqCounter::f_ready == 0) // wait until counter ready
frq=FreqCounter::f_freq; // read result
Serial.println(frq); // print result
delay(20);
}
接下來我們要將頻率數據畫出圖形,您可以用 Processing、Python、C 或 Matplotlib 等程式化出圖形。
在這裡我將介紹使用 Bridge Control Panel 軟體化出圖形。
下載 Bridge Control Panel http://www.cypress.com/?rID=38050
畫出的圖形如下:

原文詳:
1. http://interface.khm.de/index.php/lab/interfaces-advanced/arduino-frequency-counter-library/
2. http://www.instructables.com/id/Plotting-Data-From-Arduino/
電路接法:
下載頻率程式庫 http://interface.khm.de/wp-content/uploads/2009/01/FreqCounter_1_12.zip
首先我們先來練習如何偵測頻率,請將下列程式貼到 Arduino IDE 裏:
#include <FreqCounter.h>
void setup() {
Serial.begin(57600); // connect to the serial port
Serial.println("Frequency Counter");
}
long int frq;
Void loop() {
FreqCounter::f_comp= 8; // Set compensation to 12
FreqCounter::start(100); // Start counting with gatetime of 100ms
while (FreqCounter::f_ready == 0) // wait until counter ready
frq=FreqCounter::f_freq; // read result
Serial.println(frq); // print result
delay(20);
}
接下來我們要將頻率數據畫出圖形,您可以用 Processing、Python、C 或 Matplotlib 等程式化出圖形。
在這裡我將介紹使用 Bridge Control Panel 軟體化出圖形。
下載 Bridge Control Panel http://www.cypress.com/?rID=38050
畫出的圖形如下:
原文詳:
1. http://interface.khm.de/index.php/lab/interfaces-advanced/arduino-frequency-counter-library/
2. http://www.instructables.com/id/Plotting-Data-From-Arduino/
2015年1月21日 星期三
把 Arduino 讀取的數據資料轉化為圖形
Arduino 可以透過各種感測器獲取資料,您可以將這些數據透過 Serial Port 或藍芽送給 Processing 畫出圖形。
本文介紹如何在 Arduino 的 Analog Pin 0 接上一個可變電阻,藉由調整可變電阻獲取變動的數據,然後將這些數據傳送給 Procesing 畫出圖形。

電路圖

Arduino Code:
/*
Graph
A simple example of communication from the Arduino board to the computer:
the value of analog input 0 is sent out the serial port. We call this "serial"
communication because the connection appears to both the Arduino and the
computer as a serial port, even though it may actually use
a USB cable. Bytes are sent one after another (serially) from the Arduino
to the computer.
You can use the Arduino serial monitor to view the sent data, or it can
be read by Processing, PD, Max/MSP, or any other program capable of reading
data from a serial port. The Processing code below graphs the data received
so you can see the value of the analog input changing over time.
The circuit:
Any analog input sensor is attached to analog in pin 0.
created 2006
by David A. Mellis
modified 9 Apr 2012
by Tom Igoe and Scott Fitzgerald
This example code is in the public domain.
http://www.arduino.cc/en/Tutorial/Graph
*/
void setup() {
// initialize the serial communication:
Serial.begin(9600);
}
void loop() {
// send the value of analog input 0:
Serial.println(analogRead(A0));
// wait a bit for the analog-to-digital converter
// to stabilize after the last reading:
delay(2);
}
Processing Code:
// This program takes ASCII-encoded strings
// from the serial port at 9600 baud and graphs them. It expects values in the
// range 0 to 1023, followed by a newline, or newline and carriage return
// Created 20 Apr 2005
// Updated 18 Jan 2008
// by Tom Igoe
// This example code is in the public domain.
import processing.serial.*;
Serial myPort; // The serial port
int xPos = 1; // horizontal position of the graph
void setup () {
// set the window size:
size(400, 300);
// List all the available serial ports
println(Serial.list());
// I know that the first port in the serial list on my mac
// is always my Arduino, so I open Serial.list()[0].
// Open whatever port is the one you're using.
myPort = new Serial(this, Serial.list()[0], 9600);
// don't generate a serialEvent() unless you get a newline character:
myPort.bufferUntil('\n');
// set inital background:
background(0);
}
void draw () {
// everything happens in the serialEvent()
}
void serialEvent (Serial myPort) {
// get the ASCII string:
String inString = myPort.readStringUntil('\n');
if (inString != null) {
// trim off any whitespace:
inString = trim(inString);
// convert to an int and map to the screen height:
float inByte = float(inString);
inByte = map(inByte, 0, 1023, 0, height);
// draw the line:
stroke(127,34,255);
line(xPos, height, xPos, height - inByte);
// at the edge of the screen, go back to the beginning:
if (xPos >= width) {
xPos = 0;
background(0);
}
else {
// increment the horizontal position:
xPos++;
}
}
}
原文詳 http://arduino.cc/en/pmwiki.php?n=Tutorial/Graph
也許你對這個有興趣:
1. LAB: SERIAL OUTPUT FROM AN ARDUINO
https://itp.nyu.edu/physcomp/labs/labs-serial-communication/serial-output-from-an-arduino/
本文介紹如何在 Arduino 的 Analog Pin 0 接上一個可變電阻,藉由調整可變電阻獲取變動的數據,然後將這些數據傳送給 Procesing 畫出圖形。
電路圖
Arduino Code:
/*
Graph
A simple example of communication from the Arduino board to the computer:
the value of analog input 0 is sent out the serial port. We call this "serial"
communication because the connection appears to both the Arduino and the
computer as a serial port, even though it may actually use
a USB cable. Bytes are sent one after another (serially) from the Arduino
to the computer.
You can use the Arduino serial monitor to view the sent data, or it can
be read by Processing, PD, Max/MSP, or any other program capable of reading
data from a serial port. The Processing code below graphs the data received
so you can see the value of the analog input changing over time.
The circuit:
Any analog input sensor is attached to analog in pin 0.
created 2006
by David A. Mellis
modified 9 Apr 2012
by Tom Igoe and Scott Fitzgerald
This example code is in the public domain.
http://www.arduino.cc/en/Tutorial/Graph
*/
void setup() {
// initialize the serial communication:
Serial.begin(9600);
}
void loop() {
// send the value of analog input 0:
Serial.println(analogRead(A0));
// wait a bit for the analog-to-digital converter
// to stabilize after the last reading:
delay(2);
}
Processing Code:
// This program takes ASCII-encoded strings
// from the serial port at 9600 baud and graphs them. It expects values in the
// range 0 to 1023, followed by a newline, or newline and carriage return
// Created 20 Apr 2005
// Updated 18 Jan 2008
// by Tom Igoe
// This example code is in the public domain.
import processing.serial.*;
Serial myPort; // The serial port
int xPos = 1; // horizontal position of the graph
void setup () {
// set the window size:
size(400, 300);
// List all the available serial ports
println(Serial.list());
// I know that the first port in the serial list on my mac
// is always my Arduino, so I open Serial.list()[0].
// Open whatever port is the one you're using.
myPort = new Serial(this, Serial.list()[0], 9600);
// don't generate a serialEvent() unless you get a newline character:
myPort.bufferUntil('\n');
// set inital background:
background(0);
}
void draw () {
// everything happens in the serialEvent()
}
void serialEvent (Serial myPort) {
// get the ASCII string:
String inString = myPort.readStringUntil('\n');
if (inString != null) {
// trim off any whitespace:
inString = trim(inString);
// convert to an int and map to the screen height:
float inByte = float(inString);
inByte = map(inByte, 0, 1023, 0, height);
// draw the line:
stroke(127,34,255);
line(xPos, height, xPos, height - inByte);
// at the edge of the screen, go back to the beginning:
if (xPos >= width) {
xPos = 0;
background(0);
}
else {
// increment the horizontal position:
xPos++;
}
}
}
原文詳 http://arduino.cc/en/pmwiki.php?n=Tutorial/Graph
也許你對這個有興趣:
1. LAB: SERIAL OUTPUT FROM AN ARDUINO
https://itp.nyu.edu/physcomp/labs/labs-serial-communication/serial-output-from-an-arduino/
安裝 RigMesh
這是一套很棒的3D繪圖軟體,我個人覺得它非常適合小孩學習,因為它使用起來就像捏黏土一樣。

下載
http://dl.dropbox.com/u/4964558/rigmesh_v1.01.zip
安裝
解壓縮後免安裝,直接執行即可。
教學影片:
https://www.youtube.com/watch?v=1prInV9ZNY0
https://www.youtube.com/watch?v=wxHA--l44yo
下載
http://dl.dropbox.com/u/4964558/rigmesh_v1.01.zip
安裝
解壓縮後免安裝,直接執行即可。
教學影片:
https://www.youtube.com/watch?v=1prInV9ZNY0
https://www.youtube.com/watch?v=wxHA--l44yo
2014年12月15日 星期一
Android Studio 下載、安裝與設定
以前要寫 Android App 必須同時安裝 Eclipse 和 Android SDK,不僅手續繁瑣而且又須耗費不少時間去安裝與設定,現在有了 Android Studio 之後一切都變簡單了。
Android Studio 套件包括有 Android Studio IDE、Android SDK tools、Android 5.0 (Lollipop) platfrom 和 Android 5.0 emulator system image with Google APIs。
官網 http://developer.android.com/
下載 Android Studio
1. 切換網頁到 http://developer.android.com/sdk/index.html,點按螢幕中間的「Download Android Studio」綠色按鈕。
2. 勾選同意條款後,再點按下方的「Download Android Studio」藍色按鈕。
安裝 Android Studio
雙擊 android-studio-bundle-xxxx.exe,然後依照視窗提示安即可。
一些提示:
1. 在安裝過程中它會順便幫你安裝 Microsoft C++ 和 Java,此部分一樣請依照視窗指示安裝。
2. 它也會幫你建立一個安卓虛擬裝置(Android Virtul Device),這個安卓虛擬裝置就是一個手機模擬器,如果你沒有安卓手機,仍然可以利用這個虛擬裝置來設計 App。
3. 另外它還會幫你預設一個虛擬裝置驅動規劃。不同的手機需要不同的裝置驅動規劃,它目前預設的可能並未符合我們的需求,在下一階段中我將會告訴你如何規劃我們的裝置驅動。
安裝完成後的畫面如下:

安裝完後還不能保證您可以開始寫 App,還需要做一些設定才行。這些設定是在 Android Studio IDE 裏面進行的,所以我們要先進入 IDE,步驟如下:
1. 選取 Start a new Android Studio project 這個項目。
2. 然後一直點按 [Next] 鈕,最後按下 [Finish] 鈕,就會出現 Android Studio 的操作畫面。

設定 Android Studio
指定 Java 的安裝路徑,步驟如下:
1. 選擇 開始功能表 > 設定 > 控制台 > 系統 > 進階 > 環境變數。
2. 在下方的系統變數區塊內點擊 [新增] 鈕。
3. 在「變數名稱」內鍵入 JAVA_HOME,在「變數值」內鍵入 C:\Program Files\Java\jdk1.7.0_21(此處應該鍵入你電腦上的 JAVA 路徑),如圖

安裝 Android SDK
雖然最新版的 Android 系統功能最多,但由於它並未支援大多數的行動裝置,因此我們需要安裝較低版的 Android 作業系統,此處我們建議您安裝 Android 2.3.3 版。
1. 點擊操作介面下拉功能表 Tools > Android > SDK Manager,出現「Android SDK Manager」視窗。
2. 除了它自動幫您建議必須安裝的項目之外,我們還必須勾選「Android 2.3.3(API 10)」這個項目。
3. 點擊右下角落的「Install xx packages...」鈕。
4. 點擊右下角落的「Accept License」鈕,再點擊「Install」鈕。
這個步驟需要花費一點時間,請您耐心等候。如果安裝完之後發現「Install xx packages...」這個按鈕還是亮的(可被點擊),請持續這部分的安裝值到按鈕都變灰色不可按下。
5. 點擊右上角落的紅色叉叉,關閉「Android SDK Manager」。
虛擬裝置(AVD)的驅動規劃
為了模擬不同尺寸的手機或平板,我們需要為它們設置不同的驅動規劃。
如果您有實體手機或平板,可以略過此步驟。
事實上,我們不太建議您略過此步驟,畢竟有時候會在沒有實體裝置的情況下來執行 App。
1. 點擊操作介面下拉功能表 Tools > Android > AVD Manager,出現「Android AVD Manager」視窗。
2. 點擊視窗下方的「Create Virtual Device」鈕。3. 在「Category」列表裏面選擇「手機(Phone)」或「平板(Tablet)」。此處我選的是「Phone」。
4. 在右側列表裏面選擇「3.2" QVGA(ADP2)」。這是一個320x480畫素的手機,選擇這個項目可以適用於大部分的手機。
5. 點擊視窗右下方的「Next」鈕。
6. 選擇「Gingerbread 10 armeabi Android 2.3.3」後按下「Next」鈕。
7. 在 AVD Name 欄位右側鍵入您的手機名稱,然後按下「Finish」鈕。此處我是鍵入「320x480」。
8. 點擊視窗右下方的「OK」鈕。
簡單測試是否可正確執行
到這個階段我們大致上都已完成安裝與設定,不過我們還是要來測試一下是否可以正確執行 AVD。
1. 點擊工具列圖示

2. 在 Android virtual device: 右側欄位選擇「320x480」這個項目(註A),如下圖:

經過一段時間之後螢幕會出現一支手機,如下圖:
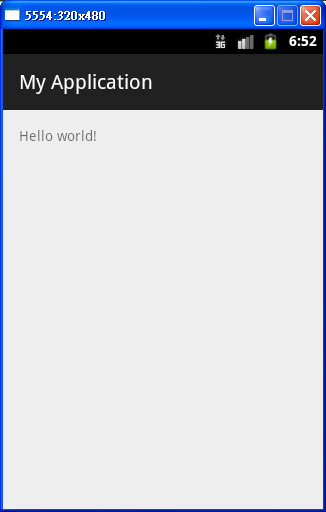
註A:
如果您有實體手機或平板,可以選擇實體裝置,這個實體裝置將會出現在列表之中。
安裝實體裝置的步驟如下:
1. 用USB線將它與電腦連接,首先安裝正確的USB驅動程式。
2. 然後執行手機桌面上的「設定(Settings)」程式,進入開發人員選項(Developer options)」 。
3. 將「USB debugging」設為「可用(Enable)」。
下一階段我會為您說明如何開始寫一個簡單的 App,請詳 http://pizgchen.blogspot.tw/2014/12/blog-post.html
2014年12月14日 星期日
開啟另一個活動(Activity)
開啟另一個活動(Activity)
原文詳 https://developer.android.com/training/basics/firstapp/starting-activity.html#BuildIntent
回應"Send"按鈕
1. 在 res/layout 路徑下編輯 activity_main.xml 檔案。
2. 在 <Button> 元素內加入 "android:onClick" 屬性。
activity_main.xml 內容看起來應如下:
<Button
android:layout_width="wrap_content"
android:layout_height="wrap_content"
android:text="@string/button_send"
android:onClick="sendMessage"/>
此 "android:onClick" 屬性的值 "sendMessage"它是一個方法(method),當使用者按下按鈕時會去執行這個方法。
3. 到 "java/com.example_xxx/myapplication1" 路徑下開啟 MainActivity.java。
4. 在 MainActivity 類別(class)下加入一個 "sendMessage()" 方法(method),如下所示:
public void sendMessage(View view) {
// Do something in response to button
}
為了讓系統能配合這個方法,您必須符合如下規定:
1. 方法必須為全域(public)。
2. 需要有一個 void 的返回值。
3. 需要有一個 View 的參數。
建立一個意圖(Intent)
所謂"意圖(Intent)",就是在按下按鈕之後所要做的事。
1. 在 MainActivity.java 的 sendMessage() 方法內部建立一個意圖,在這兒我們要啟用另一個叫做 "DisplayMessageActivity" 的活動(Activity)。程式碼如下所示:
public void sendMessage(View view) {
Intent intent = new Intent(this, DisplayMessageActivity.class);
}
注意:你會發現程式中出現紅色的文字,表示目前這兒有一些錯誤,這是因為我們目前尚未建立 "DisplayMessageActivity" 這個類別。目前您可以先忽視這個錯誤,稍後我們將會建立這個類別。
這個架構使用到兩個參數:
2. 在檔案的頂端加入這一行
提示:同時按下<Alt>+<Enter>鍵可以自動匯入(import)遺失的類別(class)。
3. 在 sendMessage() 方法裏使用 findViewById 以取得 EditText 元件。
4. 在檔案的頂端加入這一行
你也可以同時按下<Alt>+<Enter>鍵自動匯入(import) EditText 類別。
5. 取得使用者輸入的內容,將值指定給區域變數 message。並且使用 putExtra() 方法將 message 這個值加到 Intent 裏。
MainActivity.java 內容看起來應如下:
public void sendMessage(View view) {
Intent intent = new Intent(this, DisplayMessageActivity.class);
EditText editText = (EditText) findViewById(R.id.edit_message);
String message = editText.getText().toString();
intent.putExtra(EXTRA_MESSAGE, message);
}
6. 在 MainActivity 類別的頂端加入 "EXTRA_MESSAGE"的定義,如下:
public class MainActivity extends ActionBarActivity {
public final static String EXTRA_MESSAGE = "com.mycompany.myfirstapp.MESSAGE";
....
7. 在 sendMessage() 方法內呼叫 startActivity() 方法,把這個 Intent 傳送出去,如下:
public void sendMessage(View view) {
Intent intent = new Intent(this, DisplayMessageActivity.class);
EditText editText = (EditText) findViewById(R.id.edit_message);
String message = editText.getText().toString();
intent.putExtra(EXTRA_MESSAGE, message);
startActivity(intent);
}
系統接收到這個呼叫之後,會開始一個 Intent 指定的 Activity 實例,現在你需要去建立一個 DisplayMessageActivity 類別,為了這事來工作。
建立第二個活動(Activity)
所有的 Activity 次類別都必須實作 onCreate()方法,可以使用這個方法來接收 Intent 傳遞過來的資訊,同時必須在 onCreate() 方法內使用 setContentView() 方法來激活佈局,
使用 Android Studio 建立一個新的活動(Activity)
1. 在 Android Studio 的 java 路徑下選擇 com.example.myapplication1,按下滑鼠右鍵並選取 New > Activity > Blank Activity
2. 在 選擇視窗內填入下列資料:
Activity Name = DisplayMessageActivity
Layout Name = activity_display_message
Title = DisplayMessageActivity
Hierarchical Parent = com.example.myapplication1.MainActivity
Package name = com.example.john.myapplication1
按一下 [Finish] 鍵。
3. 雙擊 DisplayMessageActivity 開啟程式碼視窗。
4. 移除 onCreateOptionsMenu() 方法。
建立活動
1. 在 src/ 路徑下建立一個新檔案 DisplayMessageActivity.java,
3. 到 strings.xml 內加入這一行
4. 雙擊 manifests 在 <Application> 裏面為 DisplayMessageActivity 這個類別加入 <activity> 宣告,如下:
<?xml version="1.0" encoding="utf-8"?>
<manifest xmlns:android="http://schemas.android.com/apk/res/android"
package="com.example.john.myapplication1" >
<application
android:allowBackup="true"
android:icon="@drawable/ic_launcher"
android:label="@string/app_name"
android:theme="@style/AppTheme" >
<activity
android:name=".MainActivity"
android:label="@string/app_name" >
<intent-filter>
<action android:name="android.intent.action.MAIN" />
<category android:name="android.intent.category.LAUNCHER" />
</intent-filter>
</activity>
<activity
android:name=".DisplayMessageActivity"
android:label="@string/title_activity_display_message"
android:parentActivityName=".MainActivity" >
<meta-data
android:name="android.support.PARENT_ACTIVITY"
android:value="com.example.john.myapplication1.MainActivity" />
</activity>
</application>
</manifest>
接收意圖
1. 編輯 DisplayMessageActivity.java 檔案。
2. 移除 onCreate() 方法裏面的這一行
setContentView(R.layout.activity_display_message);
3. 取得意圖,並將他指定給 intent 區域變數。
Intent intent = getIntent();
4. 在檔案的頂端加入這一行
你也可以同時按下<Alt>+<Enter>鍵自動匯入(import) EditText 類別。
5. 使用 getStringExtra() 方法萃取從 MyActivity 傳遞過來的訊息。
String message = intent.getStringExtra(MainActivity.EXTRA_MESSAGE);
顯示訊息
1. 在 onCreate() 方法內建立 TextView 物件。
TextView textView = new TextView(this);
2. 使用 setText() 方法設定文字大小和內容。
textView.setTextSize(40);
textView.setText(message);
3. 利用 setContentView() 方法將 textView 傳送到最底層的活動佈局裏。
4. 在檔案的最頂端加入
import android.widget.TextView;
完整的 onCreatet() 方法程式碼如下:
@Override
protected void onCreate(Bundle savedInstanceState) {
super.onCreate(savedInstanceState);
// Get the message from the intent
Intent intent = getIntent();
String message = intent.getStringExtra(MainActivity.EXTRA_MESSAGE);
// Create the text view
TextView textView = new TextView(this);
textView.setTextSize(40);
textView.setText(message);
// Set the text view as the activity layout
setContentView(textView);
}
現在你可以執行這個 App 了,畫面如下:

原文詳 https://developer.android.com/training/basics/firstapp/starting-activity.html#BuildIntent
回應"Send"按鈕
1. 在 res/layout 路徑下編輯 activity_main.xml 檔案。
2. 在 <Button> 元素內加入 "android:onClick" 屬性。
activity_main.xml 內容看起來應如下:
<Button
android:layout_width="wrap_content"
android:layout_height="wrap_content"
android:text="@string/button_send"
android:onClick="sendMessage"/>
此 "android:onClick" 屬性的值 "sendMessage"它是一個方法(method),當使用者按下按鈕時會去執行這個方法。
3. 到 "java/com.example_xxx/myapplication1" 路徑下開啟 MainActivity.java。
4. 在 MainActivity 類別(class)下加入一個 "sendMessage()" 方法(method),如下所示:
public void sendMessage(View view) {
// Do something in response to button
}
為了讓系統能配合這個方法,您必須符合如下規定:
1. 方法必須為全域(public)。
2. 需要有一個 void 的返回值。
3. 需要有一個 View 的參數。
建立一個意圖(Intent)
所謂"意圖(Intent)",就是在按下按鈕之後所要做的事。
1. 在 MainActivity.java 的 sendMessage() 方法內部建立一個意圖,在這兒我們要啟用另一個叫做 "DisplayMessageActivity" 的活動(Activity)。程式碼如下所示:
public void sendMessage(View view) {
Intent intent = new Intent(this, DisplayMessageActivity.class);
}
注意:你會發現程式中出現紅色的文字,表示目前這兒有一些錯誤,這是因為我們目前尚未建立 "DisplayMessageActivity" 這個類別。目前您可以先忽視這個錯誤,稍後我們將會建立這個類別。
這個架構使用到兩個參數:
- Context 作為 new Intent 的第一個參數(之所以使用 this 是因為 Context 的次類別是 Activity)。
- App 的 Class 部件會用來驅動 Intent ,在這兒將會啟用一個 Activity。
2. 在檔案的頂端加入這一行
import android.content.Intent;
提示:同時按下<Alt>+<Enter>鍵可以自動匯入(import)遺失的類別(class)。
3. 在 sendMessage() 方法裏使用 findViewById 以取得 EditText 元件。
4. 在檔案的頂端加入這一行
import android.content.Intent;
你也可以同時按下<Alt>+<Enter>鍵自動匯入(import) EditText 類別。
5. 取得使用者輸入的內容,將值指定給區域變數 message。並且使用 putExtra() 方法將 message 這個值加到 Intent 裏。
MainActivity.java 內容看起來應如下:
public void sendMessage(View view) {
Intent intent = new Intent(this, DisplayMessageActivity.class);
EditText editText = (EditText) findViewById(R.id.edit_message);
String message = editText.getText().toString();
intent.putExtra(EXTRA_MESSAGE, message);
}
6. 在 MainActivity 類別的頂端加入 "EXTRA_MESSAGE"的定義,如下:
public class MainActivity extends ActionBarActivity {
public final static String EXTRA_MESSAGE = "com.mycompany.myfirstapp.MESSAGE";
....
7. 在 sendMessage() 方法內呼叫 startActivity() 方法,把這個 Intent 傳送出去,如下:
public void sendMessage(View view) {
Intent intent = new Intent(this, DisplayMessageActivity.class);
EditText editText = (EditText) findViewById(R.id.edit_message);
String message = editText.getText().toString();
intent.putExtra(EXTRA_MESSAGE, message);
startActivity(intent);
}
系統接收到這個呼叫之後,會開始一個 Intent 指定的 Activity 實例,現在你需要去建立一個 DisplayMessageActivity 類別,為了這事來工作。
建立第二個活動(Activity)
所有的 Activity 次類別都必須實作 onCreate()方法,可以使用這個方法來接收 Intent 傳遞過來的資訊,同時必須在 onCreate() 方法內使用 setContentView() 方法來激活佈局,
使用 Android Studio 建立一個新的活動(Activity)
1. 在 Android Studio 的 java 路徑下選擇 com.example.myapplication1,按下滑鼠右鍵並選取 New > Activity > Blank Activity
2. 在 選擇視窗內填入下列資料:
Activity Name = DisplayMessageActivity
Layout Name = activity_display_message
Title = DisplayMessageActivity
Hierarchical Parent = com.example.myapplication1.MainActivity
Package name = com.example.john.myapplication1
按一下 [Finish] 鍵。
3. 雙擊 DisplayMessageActivity 開啟程式碼視窗。
4. 移除 onCreateOptionsMenu() 方法。
建立活動
1. 在 src/ 路徑下建立一個新檔案 DisplayMessageActivity.java,
3. 到 strings.xml 內加入這一行
<string name="title_activity_display_message">My Message</string>
4. 雙擊 manifests 在 <Application> 裏面為 DisplayMessageActivity 這個類別加入 <activity> 宣告,如下:
<?xml version="1.0" encoding="utf-8"?>
<manifest xmlns:android="http://schemas.android.com/apk/res/android"
package="com.example.john.myapplication1" >
<application
android:allowBackup="true"
android:icon="@drawable/ic_launcher"
android:label="@string/app_name"
android:theme="@style/AppTheme" >
<activity
android:name=".MainActivity"
android:label="@string/app_name" >
<intent-filter>
<action android:name="android.intent.action.MAIN" />
<category android:name="android.intent.category.LAUNCHER" />
</intent-filter>
</activity>
<activity
android:name=".DisplayMessageActivity"
android:label="@string/title_activity_display_message"
android:parentActivityName=".MainActivity" >
<meta-data
android:name="android.support.PARENT_ACTIVITY"
android:value="com.example.john.myapplication1.MainActivity" />
</activity>
</application>
</manifest>
接收意圖
1. 編輯 DisplayMessageActivity.java 檔案。
2. 移除 onCreate() 方法裏面的這一行
setContentView(R.layout.activity_display_message);
3. 取得意圖,並將他指定給 intent 區域變數。
Intent intent = getIntent();
4. 在檔案的頂端加入這一行
import android.content.Intent;
你也可以同時按下<Alt>+<Enter>鍵自動匯入(import) EditText 類別。
5. 使用 getStringExtra() 方法萃取從 MyActivity 傳遞過來的訊息。
String message = intent.getStringExtra(MainActivity.EXTRA_MESSAGE);
顯示訊息
1. 在 onCreate() 方法內建立 TextView 物件。
TextView textView = new TextView(this);
2. 使用 setText() 方法設定文字大小和內容。
textView.setTextSize(40);
textView.setText(message);
3. 利用 setContentView() 方法將 textView 傳送到最底層的活動佈局裏。
4. 在檔案的最頂端加入
import android.widget.TextView;
完整的 onCreatet() 方法程式碼如下:
@Override
protected void onCreate(Bundle savedInstanceState) {
super.onCreate(savedInstanceState);
// Get the message from the intent
Intent intent = getIntent();
String message = intent.getStringExtra(MainActivity.EXTRA_MESSAGE);
// Create the text view
TextView textView = new TextView(this);
textView.setTextSize(40);
textView.setText(message);
// Set the text view as the activity layout
setContentView(textView);
}
現在你可以執行這個 App 了,畫面如下:
建立簡單的使用者介面
Android Studio - 建立簡單的使用者介面
原文詳 https://developer.android.com/training/basics/firstapp/building-ui.html
建立 Linear Layout (線性布局)
線性布局(Linear Layout)有水平(horizontal) 和垂直(vertical)兩種型式。
1. 在 Android Studio 裏切換到 res/layout 路徑,開啟 activity_main.xml 檔案。
2. 在 預覽面板(Preview)裏,點按 關閉預覽。
關閉預覽。
3. 刪除 <TextView> 元素。
4. 將 <RelativeLayout> 變更為 <LinearLayout>。
5. 加入 android:orientation 屬性將畫面設置為水平。
6. 移除 android:padding 屬性並加入 tools:context 屬性。
res/layout/activity_mail.xml 內容看起來應如下:
<LinearLayout xmlns:android="http://schemas.android.com/apk/res/android"
xmlns:tools="http://schemas.android.com/tools"
android:layout_width="match_parent"
android:layout_height="match_parent"
android:orientation="horizontal">
</LinearLayout>
加入文字欄位
1. 在 activity_main.xml 檔案的 <LinearLayout> 裏面定義一個 <Edittext> 元素,並將
它的 ID 屬性設為 @ + ID / edit_message 。
2. 將 layout:width 和 layout_height 屬性的值設為 warp_content。
3. 將 hint 的屬性值設為 edit_message 的 string 物件。
<EditText>元素內容看起來應如下:
<EditText android:id="@+id/edit_message"
android:layout_width="wrap_content"
android:layout_height="wrap_content"
android:hint="@string/edit_message" />
你應該可以注意到有紅色的文字出現,這表示該行有錯誤。
底下我們要來修訂這個錯誤。
加入 String 資源
預設情況下,專案包含有一個 res/values/string.xml 資源,我們將會在這兒增加一個 "edit_message" 的項目,並將它的值設為 "Edit a message"。
1. 在 res/values 路徑下開啟 strings.xml。
2. 加入 "edit_message" 這一行,並將它的值設為 "Edit a message"。
3. 加入 "button_send" 這一行,並將它的值設為 "Send"。這個東西是作為我們下一階段給按鈕元件使用的。
4. 移除 "hello world" 文字。
strings.xml 內容看起來應如下:
<?xml version="1.0" encoding="utf-8"?>
<resources>
<string name="app_name">My Application1</string>
<string name="action_settings">Settings</string>
<string name="edit_message">Edit a message</string>
<string name="button_send">Send</string>
</resources>
加入一個按鈕
1. 在 res/layout 路徑下編輯 activity_main.xml。
2. 在 <LinearLayout> 內部的 <EditText> 下方加入一個按鈕元素 <Button>。
3. 設定按鈕的 "width" 和 "height" 屬性值為 "warp_content"。
4. 將按鈕的文字標籤屬性 :androis:text 設為 string 資源裏的 "button_send"。
activity_main.xml 內容看起來應如下:
<LinearLayout xmlns:android="http://schemas.android.com/apk/res/android"
xmlns:tools="http://schemas.android.com/tools"
android:layout_width="match_parent"
android:layout_height="match_parent"
android:orientation="horizontal">
<EditText android:id="@+id/edit_message"
android:layout_width="wrap_content"
android:layout_height="wrap_content"
android:hint="@string/edit_message" />
<Button
android:layout_width="wrap_content"
android:layout_height="wrap_content"
android:text="@string/button_send" />
</LinearLayout>
注意: 這個按鈕並不需要一個 android:id 屬性,因為它不會被其他介面所參考。
目前這個佈局包刮了一個 EditText 元件和 Button 元件,如下所示:

目前雖然這個按鈕可以正常運作,但由於使用者可能在會在輸入盒(EditText)裏鍵入過長的文字,所以我們可以透過指定這個元件的 weight (權重),來重新分配 "EditText" 和 "Button" 所佔用的比例。
所有工具元件權重的預設值都是 0,如果你指定大於 0 的值,你就可以看到元件佔據該空間的比例。
讓輸入盒(EditText)充滿螢幕寬度
1. 將 <EditText> 的 "layout_weight" 屬性設為 1。
2. 同時將 <EditText> 的 "layout_width" 屬性設為 0dp。
activity_main.xml 內容看起來應如下:
....
<EditText android:id="@+id/edit_message"
android:layout_weight="1"
android:layout_width="0dp"
android:layout_height="wrap_content"
android:hint="@string/edit_message"/>
....
切換到 Display 頁籤,你可以看到目前這個佈局外觀變更了,如下所示:

所以, activity_main.xml 最終內容看起來應如下:
<LinearLayout xmlns:android="http://schemas.android.com/apk/res/android"
xmlns:tools="http://schemas.android.com/tools"
android:layout_width="match_parent"
android:layout_height="match_parent"
android:orientation="horizontal">
<EditText android:id="@+id/edit_message"
android:layout_weight="1"
android:layout_width="0dp"
android:layout_height="wrap_content"
android:hint="@string/edit_message"/>
<Button
android:layout_width="wrap_content"
android:layout_height="wrap_content"
android:text="@string/button_send" />
</LinearLayout>
執行這個 APP
點按 這個工具列按鈕,執行我們上面所建立的 APP。
在下一個階段,我會告訴您如何回應按鈕的動作,去取得使用者輸入的內容,並開啟另一個活動(Activity),詳 http://pizgchen.blogspot.tw/2014/12/activity.html。
原文詳 https://developer.android.com/training/basics/firstapp/building-ui.html
建立 Linear Layout (線性布局)
線性布局(Linear Layout)有水平(horizontal) 和垂直(vertical)兩種型式。
1. 在 Android Studio 裏切換到 res/layout 路徑,開啟 activity_main.xml 檔案。
2. 在 預覽面板(Preview)裏,點按
關閉預覽。3. 刪除 <TextView> 元素。
4. 將 <RelativeLayout> 變更為 <LinearLayout>。
5. 加入 android:orientation 屬性將畫面設置為水平。
6. 移除 android:padding 屬性並加入 tools:context 屬性。
res/layout/activity_mail.xml 內容看起來應如下:
<LinearLayout xmlns:android="http://schemas.android.com/apk/res/android"
xmlns:tools="http://schemas.android.com/tools"
android:layout_width="match_parent"
android:layout_height="match_parent"
android:orientation="horizontal">
</LinearLayout>
加入文字欄位
1. 在 activity_main.xml 檔案的 <LinearLayout> 裏面定義一個 <Edittext> 元素,並將
它的 ID 屬性設為 @ + ID / edit_message 。
2. 將 layout:width 和 layout_height 屬性的值設為 warp_content。
3. 將 hint 的屬性值設為 edit_message 的 string 物件。
<EditText>元素內容看起來應如下:
<EditText android:id="@+id/edit_message"
android:layout_width="wrap_content"
android:layout_height="wrap_content"
android:hint="@string/edit_message" />
你應該可以注意到有紅色的文字出現,這表示該行有錯誤。
底下我們要來修訂這個錯誤。
加入 String 資源
預設情況下,專案包含有一個 res/values/string.xml 資源,我們將會在這兒增加一個 "edit_message" 的項目,並將它的值設為 "Edit a message"。
1. 在 res/values 路徑下開啟 strings.xml。
2. 加入 "edit_message" 這一行,並將它的值設為 "Edit a message"。
3. 加入 "button_send" 這一行,並將它的值設為 "Send"。這個東西是作為我們下一階段給按鈕元件使用的。
4. 移除 "hello world" 文字。
strings.xml 內容看起來應如下:
<?xml version="1.0" encoding="utf-8"?>
<resources>
<string name="app_name">My Application1</string>
<string name="action_settings">Settings</string>
<string name="edit_message">Edit a message</string>
<string name="button_send">Send</string>
</resources>
加入一個按鈕
1. 在 res/layout 路徑下編輯 activity_main.xml。
2. 在 <LinearLayout> 內部的 <EditText> 下方加入一個按鈕元素 <Button>。
3. 設定按鈕的 "width" 和 "height" 屬性值為 "warp_content"。
4. 將按鈕的文字標籤屬性 :androis:text 設為 string 資源裏的 "button_send"。
activity_main.xml 內容看起來應如下:
<LinearLayout xmlns:android="http://schemas.android.com/apk/res/android"
xmlns:tools="http://schemas.android.com/tools"
android:layout_width="match_parent"
android:layout_height="match_parent"
android:orientation="horizontal">
<EditText android:id="@+id/edit_message"
android:layout_width="wrap_content"
android:layout_height="wrap_content"
android:hint="@string/edit_message" />
<Button
android:layout_width="wrap_content"
android:layout_height="wrap_content"
android:text="@string/button_send" />
</LinearLayout>
注意: 這個按鈕並不需要一個 android:id 屬性,因為它不會被其他介面所參考。
目前這個佈局包刮了一個 EditText 元件和 Button 元件,如下所示:
所有工具元件權重的預設值都是 0,如果你指定大於 0 的值,你就可以看到元件佔據該空間的比例。
讓輸入盒(EditText)充滿螢幕寬度
1. 將 <EditText> 的 "layout_weight" 屬性設為 1。
2. 同時將 <EditText> 的 "layout_width" 屬性設為 0dp。
activity_main.xml 內容看起來應如下:
....
<EditText android:id="@+id/edit_message"
android:layout_weight="1"
android:layout_width="0dp"
android:layout_height="wrap_content"
android:hint="@string/edit_message"/>
....
切換到 Display 頁籤,你可以看到目前這個佈局外觀變更了,如下所示:
所以, activity_main.xml 最終內容看起來應如下:
<LinearLayout xmlns:android="http://schemas.android.com/apk/res/android"
xmlns:tools="http://schemas.android.com/tools"
android:layout_width="match_parent"
android:layout_height="match_parent"
android:orientation="horizontal">
<EditText android:id="@+id/edit_message"
android:layout_weight="1"
android:layout_width="0dp"
android:layout_height="wrap_content"
android:hint="@string/edit_message"/>
<Button
android:layout_width="wrap_content"
android:layout_height="wrap_content"
android:text="@string/button_send" />
</LinearLayout>
執行這個 APP
點按
這個工具列按鈕,執行我們上面所建立的 APP。在下一個階段,我會告訴您如何回應按鈕的動作,去取得使用者輸入的內容,並開啟另一個活動(Activity),詳 http://pizgchen.blogspot.tw/2014/12/activity.html。
訂閱:
文章 (Atom)